
If you own an iPhone, you’ve probably run into the “Face ID not working move iPhone lower” problem at least once, especially when you wear a mask.
Protecting the information on any device requires a high level of security. Fortunately, Apple proved they are working hard to protect our data by introducing Face ID.
Although this feature has revolutionized how we unlock our iPhones, it has flaws.
This guide walks you through some of the ways to fix Face ID on your iPhone when it keeps saying, “Move phone lower and move phone higher.”
See also: iPhone Call Failed? Here’s how to fix it!
Reasons for iPhone Face ID Not Working
Face ID uses both software (iOS) and a unique sensor called TrueDepth to unlock your phone. So, a problem with either one might cause the iPhone’s Face ID to malfunction.
When troubleshooting, there are a few things to look for, but here are a few of the more prevalent ones:
- The camera is dusty or has something in front of it that prevents it from working correctly.
- It is difficult to see your face if you are wearing a face mask, for example.
- Your iOS version is out of date.
- Face ID has other issues, such as the TrueDepth camera being down.
- More than two days have passed since you last unlocked your phone.
- Your phone’s Emergency SOS feature is switched on.
Troubleshooting Face ID Not Working “Move iPhone a Little Lower/Higher”
Here are all the tips you’ll learn about in this tutorial:
1. Clean the Front-facing Sensors
The most common reason for the iPhone’s face recognition not working is dirt and dust on the front-facing camera.
Double-check the Face ID function after cleaning the notch on your iPhone screen. Move to the next step if the problem persists.
2. Reset Face ID
Turning off and on Face ID frequently causes performance issues and temporary malfunctions on iPhones. In most cases, resetting the Face ID feature resolves the problem.
Follow the steps below to do so:
1. First, go to Settings.

2. Then, tap the Face ID & Passcode option.

3. Select Reset Face ID.

5. Now go to the Face ID & Passcode menu again.
5. Tap on Set up Face ID and follow the instructions.

Check to see if the problem has been resolved; if not, proceed to the next step.
3. Update iOS
Using outdated iPhone iOS versions can also lead to Face ID malfunctions. So, always try to install the latest iOS version on your phone.
To download and install new iOS updates, do the following steps:
1. First, ensure you’re connected to a reliable Wi-Fi network with internet connectivity and that your iPhone’s battery is at least 60% charged.
2. Enter the Settings app.
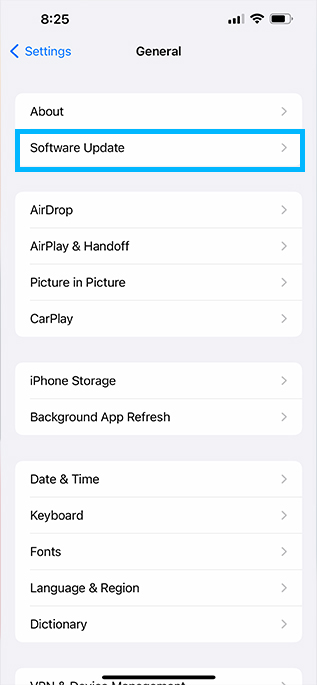
3. Following that, scroll down to General and tap on it.

4. Then, select the Software Update option.
5. Now, tap the “Download & Install” option and wait for the update to download and install.
Your iPhone will restart automatically after updating to the latest iOS version.
First, check if the Face ID function works properly, and if it doesn’t, proceed to the next step.
4. Reset All iPhone Settings
Resetting all iPhone settings is the next solution that we recommend you use. Doing so will remove all personal settings you have applied to the iPhone and restore them to factory defaults.
To reset the iPhone setting, do the steps below:
1. First things first, open the Settings app.
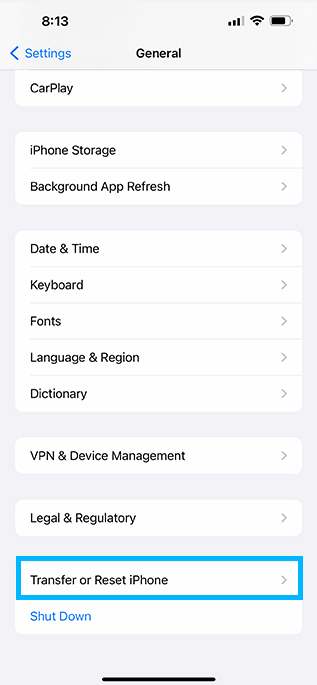
2. Scroll down and tap General.
3. Tap Transfer or Reset iPhone at the bottom of the General menu.
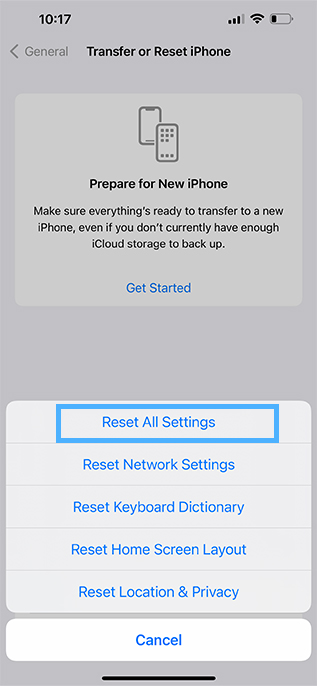
4. Select Reset.

5. Tap the Reset All Settings option, then confirm the action.
Wait a few minutes for the iPhone settings to reset. After that, you need to set up the Face ID feature.
To do this, follow these steps:
1. Open Settings.
2. Select the Face ID & Passcode option.
3. Select the Set Up Face ID option.
4. Tap on Get Started. Then, finish the Face ID setup.

Now, return to the home screen and press the power button to lock the screen of your iPhone. Finally, check to see if the Face ID feature is operational.
5. Factory Reset
If none of the above methods fix your iPhone’s Face ID issue, a factory reset is your last option.
However, it should be noted that if you factory reset your iPhone, all your data will be lost. As a result, ensure that your data is backed up.
1. Go to the Settings app.
2. Scroll down and tap General.
3. Select Transfer or Reset iPhone at the bottom of the General menu.
4. Tap the Erase All Content and Settings option.

5. Confirm the factory reset by tapping the Reset All Content & Settings option again.
Your phone will restart automatically after the factory reset, and you should complete some initial setup, including Face ID.
Follow the steps below if you missed the Face ID configurations:
1. First, go to Settings.
2. Then tap on Face ID & Passcode. If asked, enter your passcode.
3. Tap Set Up Face ID.
4. Now, position your face in front of your iPhone and tap Get Started. Then, proceed to complete the setup process.
Wrap-Up: Face ID Not Working
Even though Face ID has improved with time, and the number of users reporting the Face ID not working error has significantly decreased, some users continue to have issues.
In most cases, though, the issue isn’t caused by software or hardware malfunction, and cleaning the camera will resolve the problem.
So, before resetting your phone or trying other alternatives, clean the front sensors and make sure nothing is covering your face.
I hope this assisted you in fixing the Face ID not working on your iPhone. If you fixed the problem with any other solution, please share it in the comments section.