If your Mac is stuck on checking for updates, there are a few simple troubleshooting steps you can take to get things moving again.
This article will walk you through what to do if your Mac gets stuck while checking for updates. With just a little patience and some elbow grease, you’ll be up and running in no time. So let’s get started!
Why is Your Mac Stuck on Checking for Updates?
There are a number of reasons why your Mac might get stuck on the “checking for updates” stage. Here are some of the most common causes:
- You have too many apps open, and your Mac is running low on memory.
- Your network connection is slow, or there’s a problem with your internet connection.
- A software update is downloading in the background and taking up too much bandwidth.
- The App Store server is temporarily down or busy.
- There’s a problem with the App Store or Apple’s software update servers.
- Bugs in the NVRAM or SMC.
- You have data from old updates stored on your Mac that is interfering with the new updates.
- Your macOS license is not legitimate.
More often than not, the Macs get stuck on the “checking for updates” screen due to software-related issues instead of hardware which are easy to fix.
How to Fix Mac Stuck on Checking for Updates
Since it can be hard to know what’s exactly causing your Mac to be stuck on checking for updates, you’ll have to try multiple solutions and see what works for you.
However, most of the time, you can easily fix your Mac getting stuck on checking for updates by restarting your Mac and WiFi or disabling FileVault and freeing up some space. Alternatively, you could boot your Mac into safe mode.
We recommend going through the troubleshooting steps in order, starting with the simplest and most straightforward solution and progressing to the most complex and time-consuming one.
1. Restart Your WiFi
Oftentimes, internet connectivity issues can make your Mac stuck on checking for updates. So, you first want to ensure that your WiFi is working fine. For this, you should restart your WiFi.
Here’s how to do it:
- Switch off your router.
- Wait for around 20 seconds.
- Turn your router back on.
Next, check whether your WiFi is working on other devices. If it’s not, you’d need to get in touch with your service provider and get your WiFi fixed or connect to a new WiFi.
2. Turn Off FileVault
FileVault is a security feature that encrypts your hard drive so that only authorized users can access it. When FileVault is turned on, your Mac will ask for a password every time you boot up or log in.
While this is great for security, it can also cause problems when trying to install updates. That’s because the encryption process can take a while, and if your Mac times out while checking for updates, it will get stuck in the loop.
So, disabling FileVault on your Mac can help it move from checking for updates. Here’s how to do it:
- Open Apple Menu > Restart.

For unresponsive Macs, press the Power Button on your Mac and hold it until it shuts off. Wait for around 20 seconds, and press the Power Button again to turn it on.
- Navigate to System Settings > Privacy & Security.

- Now scroll down to find FileVault under the Security section and click Turn Off…

- Enter your credentials to authenticate your identity and click Unlock.

- Now you’ll see another popup window asking for your final approval to turn off Filevault. Here, click the Turn Off Encryption button.

- Now your Filevault will be turned off. Restart your Mac and try checking for updates again. If you ever need to turn on your Filevault again, just follow the same process and click the Turn On button.

3. Enter Your Mac into Safe Mode
If restarting your Mac doesn’t help, try restarting it in Safe Mode. This should solve the problem if a third-party application causes it. The procedure to enter Safe Mode is different for Intel-based and M1/M2-based Macs.
Not sure whether your Mac is Intel or M1/M2-based? To find out, go to Apple menu > About This Mac. If your chip/processor contains the word “Intel,” yours is an Intel-based Mac. Otherwise, it’s an M1/M2-based Mac.
Booting into Safe Mode: Intel-Based Macs
To boot your Intel-based Mac into Safe Mode, follow these steps:
- First, shut your Mac down by navigating to the Apple menu > Shut Down.

- In case your Mac is stuck or unresponsive, press the Power Button and hold it until the Mac shuts down.
- Next, press and hold down the Shift key while turning your Mac back on. Your Mac should boot into Safe mode now.
Booting into Safe Mode: M1/M2-Based Macs
Booting into Safe Mode on M1/M2-based Macs is slightly different. To do so:
- Shut your Mac down (either from the Apple menu > Shut Down or by holding the Power Button).
- Wait for ~ 10 seconds for the Mac to be turned off completely.
- Press the Power Button and hold it like that for about 10 seconds until loading startup options (Macintosh HD and Options) appear.
- While pressing and holding the Shift key, hover over Macintosh HD and click Continue in Safe Mode.
Alternate Ways to Fix Mac Stuck on Checking for Updates
Is your Mac still stuck despite doing all of the above? Here are some alternate solutions that can fix your problem:
1. Clear App Store Cache
If your Mac isn’t updating apps from the Mac store, clearing the App Store cache might help. Here’s how to do so:
- Navigate to Go on the menu bar at the top of your Mac’s screen, and click Go to Folder.

- Paste “~/Library/Caches/com.apple.appstore” (Without quotation marks).

- Now right-click the folder and click Move to Bin to delete it.

2. Check If There’s Enough Storage on Your Mac
You might be tempted to scrape up enough space to barely get the new update installed, but you shouldn’t make it a practice.
Ideally, you should have at least 5 – 10 GB of free storage after the update for your Mac to run smoothly. Here’s how you can check your free storage:
- Navigate to the Apple menu > About This Mac.

- On the popup window that appears, click More info.

- Scroll down and click Storage Settings.

- Now, follow the recommendations on the screen to optimize your Mac’s storage.

- If you’re short on space, you can free up some space using Mac’s in-built optimization tool. To use that, click Optimize Storage in the Recommendations section.

If that doesn’t cut it, you can always delete unwanted apps and system jump. But make sure not to delete any backups to free up space.
3. Restart Your NVRAM and SMC
NVRAM (Non-Volatile RAM) is a battery-packed memory that stores information about your Mac’s date and time, your selected startup disc, speaker volume, and screen resolution.
Whereas SMC, short for System Management Controller, deals with power management, keyboard backlighting, and fan control.
In M1/M2-based Macs, silicon chips control the NVRAM and SMC, so a simple restart will do. But for Intel-based Macs, you have to do the following to reset your NVRAM:
- Power off your Mac.
- Press and hold Command (⌘), Option, P, and R keys.
- While holding these keys, Power On your Mac.
- Let go of the keys after 15 – 25 seconds.
Note: Use a wired keyboard instead of a Bluetooth keyboard for this procedure.
The process of resetting the SMC varies slightly on different Macs. Whichever Mac you have, the first thing to do is to power it down. Next, follow the given procedure according to your device:
For Desktop Macs
- Cut off the power supply.
- Wait for 15 – 20 seconds.
- Press the Power Button 2-3 times while the power supply is cut off.
- Plug in the power cord.
- Wait for 5 – 10 seconds.
- Power on your Mac.
On Macs with Removable Batteries
- Unplug your charger if it’s connected.
- Remove your battery.
- Press the Power Button 2-3 times with the battery taken out.
- Put the battery back in.
- Power on your Mac.
For Macs with Non-Removable Batteries
- Press the Shift, Control, and Option keys and the Power Button, and hold them all for a few seconds.
- Keep on holding for ~ 10 seconds, then let go.
- Plug in your charger and power it on.
4. Install macOS from Apple’s Official Site
Sometimes, your Mac can hang while checking for updates if there is a huge macOS update. In that case, head over to Apple’s website, and download your macOS from there. This step isn’t necessary for minor updates.
5. Update macOS from the Terminal
You can update your macOS from the Terminal, too. This doesn’t require any technical/coding knowledge, and anyone can do it. Here’s how:
- Navigate to Utilities on the menu bar at the top of your screen.

- Open Terminal.

- Type “software update -1”

- Enter the name of the update:
sudo softwareupdate -i update_pkg_name
If the update’s name has white spaces in its name, enclose the name within single quotation marks.
6. Reinstall macOS
Though reinstalling macOS doesn’t delete your data, I still recommend backing it up using TimeMachine first. To reinstall macOS, you need to access macOS Recovery, which varies slightly on Intel-based and M1/M2-based Macs.
For M1/M2-based Macs:
Turn on your Mac while pressing and holding the Power Button until Startup Options appear. Click Options, then continue.
For Intel-based Macs
Turn on your Mac while pressing and holding Command ⌘ – R until the Apple logo appears.
From here on, the procedure is the same for all types of Macs. Proceed and:
- Select the user, then enter your credentials.
- Click Reinstall macOS Version, then click Continue.
- Follow the onscreen instructions.
Two important points to note:
- If the installer can’t detect your disk or says it can’t install on your Mac, you’ll have to erase your disk.
- If given a choice between Macintosh HD or Macintosh HD – Data, choose Macintosh HD.
Frequently Asked Questions
If your Mac has been stuck on “Checking for Updates” for more than 5-10 minutes, chances are it’ll stay that way unless you do something about it. So yes, your Mac will continue “Checking for Updates” unless you do something about it following the steps given above.
If your Mac is still “Checking for Updates,” this means no update has started taking place yet. So, if you power off and on your Mac during it, no data on your disk will be lost or corrupted. In fact, there is a good chance that your Mac will stop showing “Checking for Updates.”
While viruses and malware can make your device malfunction, they are highly unlikely to make your Mac stuck on “Checking for Updates.” Most of the time, such issues are caused by a glitch in your current macOS somewhere. By following the abovementioned methods, you will be able to identify and fix them.
Final Thoughts on Mac Stuck on Checking for Updates
Fixing the “Checking for Updates” error on a Mac is pretty easy and can be solved by following one of these methods.
- Restarting Your WiFi
- Turning Off FileVault
- Entering Your Mac into Safe Mode
- Clearing App Store Cache
- Checking If There’s Enough Storage on Your Mac
- Restarting Your NVRAM and SMC
- Installing macOS from Apple’s Official Site
- Updating macOS from the Terminal
- Reinstalling macOS
Now that you know how to fix your Mac stuck on Checking for Updates, ensure you don’t encounter this issue again by keeping your macOS up-to-date.
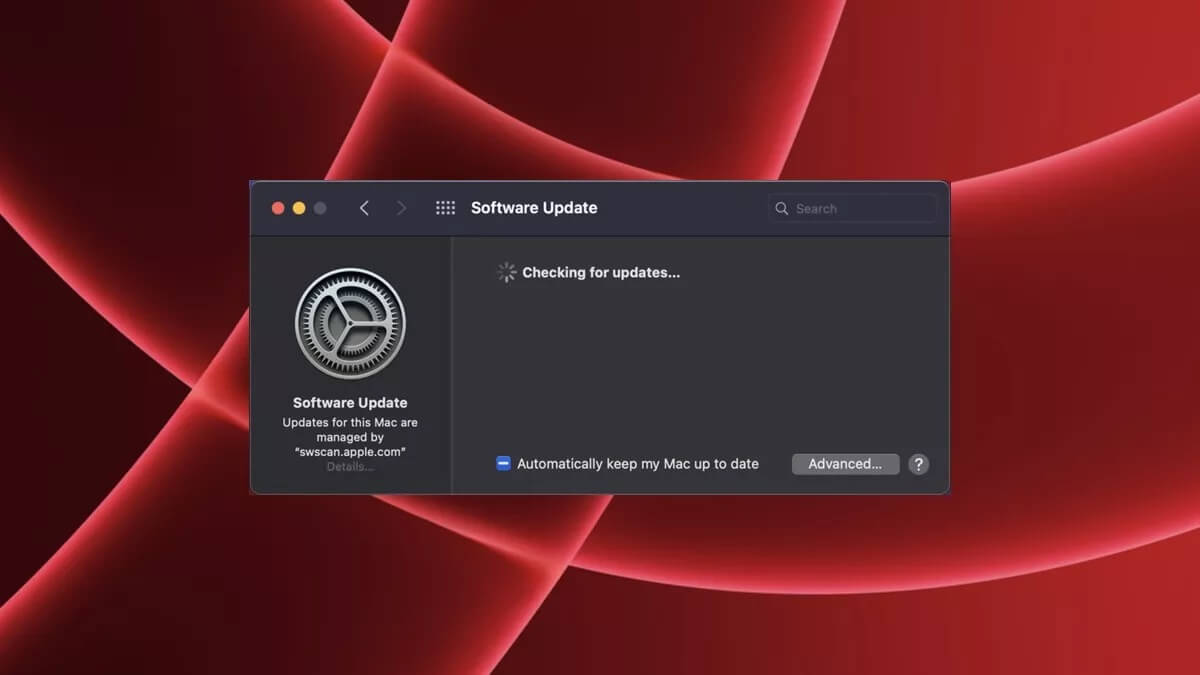
To do this, go to System Preferences > Software Update, and click the checkbox next to Automatically keep my Mac up to date.
This way, you won’t have to manually search for updates, as your Mac will update itself automatically when new software versions are released.
I hope this assisted you in fixing your Mac getting stuck on the “Checking for updates” error. If you fixed the problem with any other solution, please share it in the comments section.