
If you’re reading this, you’re probably wondering how to set up iMessage on Mac. It’s a no-brainer because Apple has brought many iOS apps like Messages, Notes, Stocks to the Mac.
This step-by-step guide will show you all the steps to get started with the Messages app on your Mac computer.
Note: To set up iMessage on your Mac, you need macOS X High Sierra or later on your Mac, and iOS 10 or later on your iPhone.
In case you were wondering, there’s a workaround to get iMessage on PC. So if you’d like to get iMessage on your Windows computer, the instructions in this guide will walk you through the steps.
How to Set Up iMessage on Mac
Step 1 – On your Mac, click on the Messages icon in the dock to open the Messages app. Or click on the search icon at the upper right corner of your screen, and type “Messages”, it will show up in the “TOP HIT” results.

Look, you don’t need an iPhone to use iMessage on your Mac. All you need is an Apple ID. If you don’t have one, you’ll need to create one. It’s free.
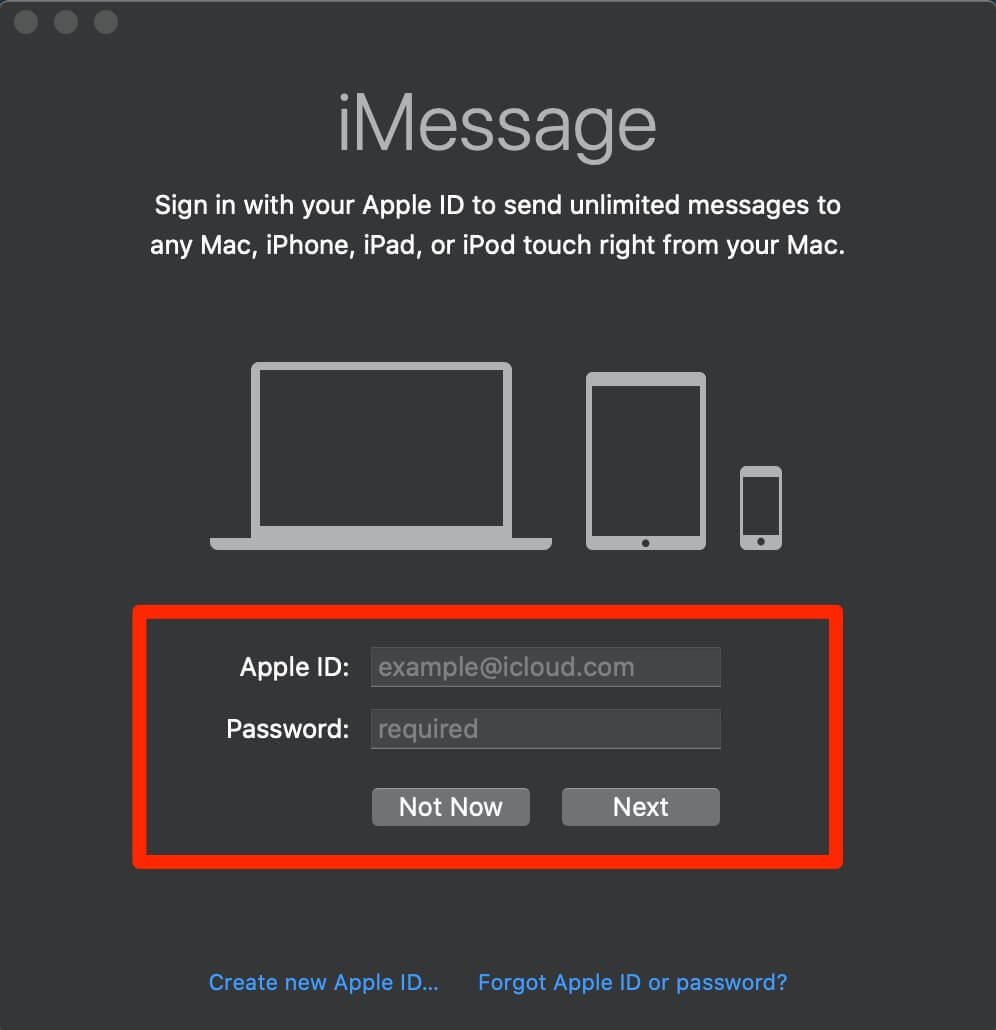
Step 2 – Sign in using your Apple ID and password. If you’ve turned on a two-step or two-factor authentication for your Apple ID, you’ll need to enter your verification code.

Step 3 – iMessage also gives you the option to add a third-party messaging service, including Google, Yahoo, and AOL accounts. But, for the sake of this guide, we’ll only focus on Apple’s message account.
Step 4 – In the menu bar, click on “Messages” and select “Preferences”.

Step 5 – Now click on the “iMessage” tab and make sure that “Enable this account” and “Enable Messages in iCloud” are both checked.
Step 6 – If you have multiple accounts, such as your phone number and Apple ID, you can receive messages on any of them. Choose how you’d like to be contacted by picking one of these accounts in the “You can be reached for messages at” section.

In case your phone number is not showing up on your Mac, you will need to add it using your iPhone settings.
Go to the “Settings” app, tap “Messages”, then “Send & Receive”. Look for the section that says “You can receive iMessages to and reply from” and be sure your phone number has a check beside it.

You may receive a pop-up on your Mac’s home screen asking if you’d like to add your phone number to iMessage and FaceTime. Click yes to confirm. Once you’ve added your phone number, you can turn it on in iMessage on your Mac.
Once you’re done with that, you can start using iMessage on your Mac.
Now that you’ve logged in, you should know how to sign out of iMessage on Mac.
Your Contacts Don’t Use iPhone?
Now what happen if some of your contacts do not own an iPhone?
You can still send and receive text messages to non-iPhone users from your Mac. Here’s what you need to do.
While you’re in your iPhone Settings, tap “Messages” and tap on “Text Messages Forwarding”. Turn the slider next to your MacBook’s name to green.

Messages you send to non-iPhone users will have a green bubble showing that you’re not sending iMessages, but text messages. A green bubble may also be an indication of getting blocked on iMessage.
Check this out: Gotechtor’s guide to fixing common iMessage problems
How to Enable iMessage in iCloud
It’s no secret that messages can use a ton of storage on your iPhone as time goes by. With the iOS 11.4 updates, you can manage your messages in iCloud, which can you save storage space on your iPhone.
iMessage in iCloud has a few benefits. If one of your Apple devices runs out of storage, you can delete those messages to free up some space but will remain available in iCloud.
All your message history will show up when you set up a new Mac from scratch. You don’t have to restore your Mac from a backup anymore.
How to Set Up iMessage in iCloud

To set up iMessage in iCloud, follow the steps below:
- Go to your iPhone settings
- Tap the banner with your name on it
- Tap iCloud
- Toggle the slider next to iMessage to green
To sync your messages across all your Apple devices, you need to sign in with the same Apple ID you use with Messages on your iPhone and other devices.
Just click the “Sync Now” button to download all your message history so you don’t need to start afresh.
If you have any feedback or questions, then please don’t hesitate to leave a comment below.