Wondering why is your Android battery draining so fast and how you can increase the battery life on your Android phone?
Newer Android phones come with powerful hardware and advanced features. They are sleeker, have brighter displays, faster processors, better software, and a faster internet connection.
But all these factors take a heavy toll on the battery of your phone, which can make your phone shut off unexpectedly.
So, if you are worried about improving the battery life of your Android phone, you can follow these ten tips to make your Android phone’s battery life last longer.
Tips to Boost Your Android Phone’s Battery Life
We have compiled a list of effective tips to increase your Android mobile’s battery life. Let’s have a look.
1. Lower Display Brightness
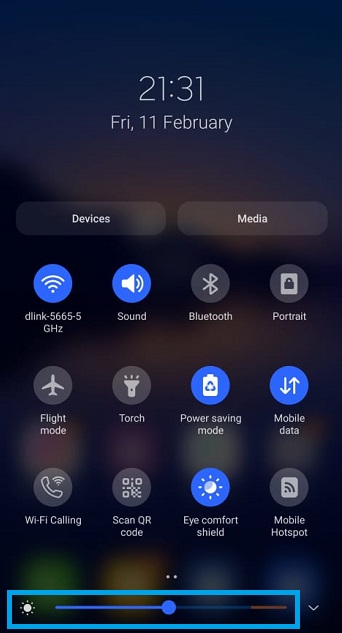
We’re not going to start with something drastic right off the bat. We’ll keep it simple. So, just start by lowering the brightness of the display a bit.
Usually, we use our smartphones with optimal brightness. These days, all the new Android skins have a limiting feature where the OS keeps the brightness at 80%. You’ll get a warning when you try to increase it past 80%.
While smartphones are getting intuitive and trying to take care of our eyes. The brightness level set at 80% is still too much. Turn it down to 60%, maybe 50%, if you are comfortable.
This change will not only make the smartphone display easier on your eyes but also increase the battery life of your device. You will at least get an extra hour out of your Android phone.
2. Adjust Screen Timeout
Well, we are still sticking to the smartphone displays, and consider switching it off when you are not using the device.
This means you need to change how long your smartphone display stays on when it’s not being used.
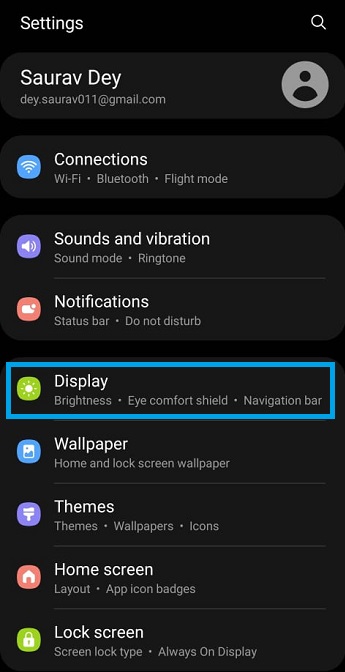
- Go to the Settings of your Android smartphone and tap on the Display option.
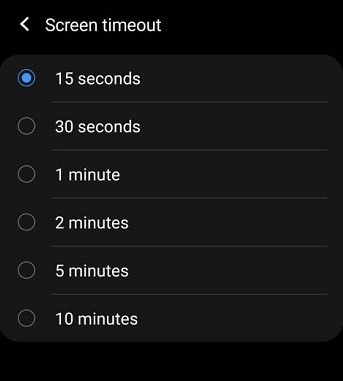
- In the Display menu, tap on the Screen Timeout option.
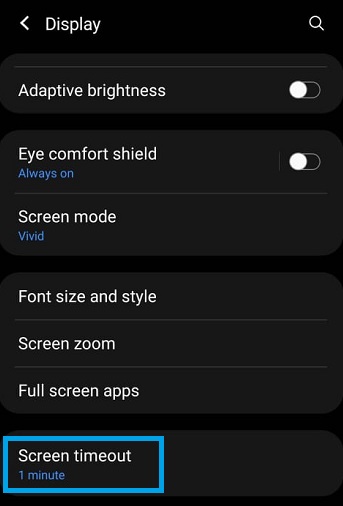
- Now, you will have to choose an option, and we highly recommend selecting 30 seconds or if you want to be a bit more aggressive, go for 15 seconds.
Now, the Android display will be turned off sooner, and the battery life will be expanded. But this is not enough. You also need to disable Always On Display from the Android Lock Screen Settings.
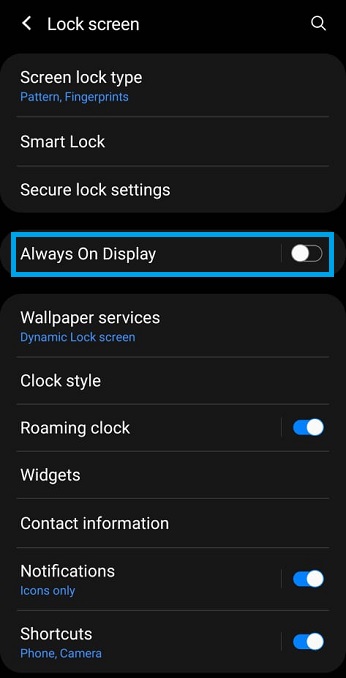
Enabling this feature adds nothing to the Android experience. You will just be able to view the date and time, even when the display is off. So, if you want to increase the battery life of your Android phone, this feature must be turned off.
3. Use Airplane Mode
The wireless signal is an enemy of your smartphone battery. Wi-Fi, Mobile Data, and Bluetooth are useful features on Android. But we don’t use them all the time.
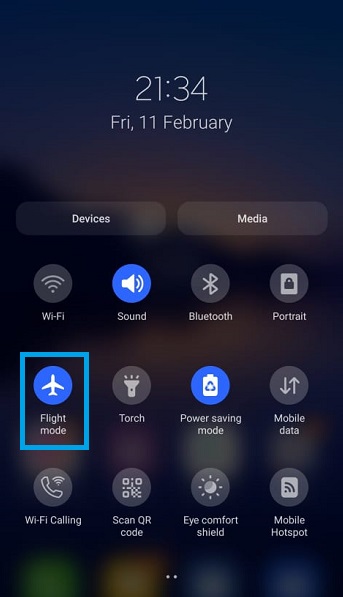
So, when you are not using them, consider turning them off by activating the Airplane Mode/Flight Mode. You can individually disable each function but using the Airplane Mode is more convenient.
Swipe down the Control Center of your Android device and tap on Flight Mode to enable it. You can disable the Airplane Mode the same way when you need to use the internet or Bluetooth.
4. Deactivate Vibration
Vibration is an excellent feature on smartphones. It makes you aware of your mobile when you are not in a station or a place to hear it.
For some users, vibration is a must feature. However, smartphones don’t resonate with strong vibrations by magic. There is a small motor placed inside the device that helps to create the vibration, but it also drains the battery.
So, if you really want to increase the battery life of your Android phone, try not to use the vibration feature.
5. Activate Dark Mode
Android phones are equipped with a Dark Mode option which is easier on the eyes. But it can also help you to save battery.
However, this tip is limited to Android devices with OLED or AMOLED displays. These types of displays get turned off when displaying the black color.
Hence, activating the Dark Mode will save and ultimately increase the battery life. So, here’s what you need to do.
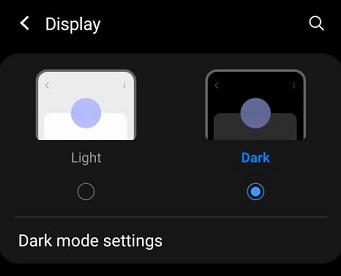
- Launch the Settings app on your Android mobile and select the Display option.
- The Light Mode and Dark Mode options will be visible at the top of the Display Menu. Select the Dark Mode.
Alternatively, you can also swipe down the Android Control Center panel and tap on the Dark Mode option to activate it.
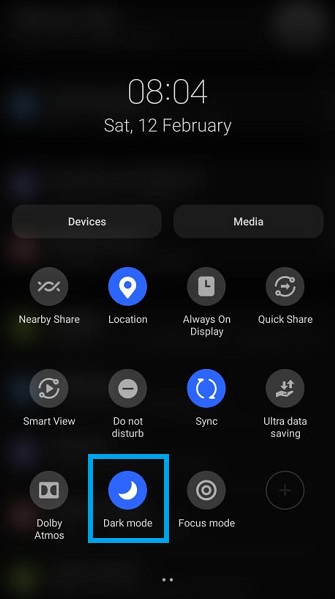
So, no matter which method you choose to activate the Dark Mode on Android, it will effectively increase the battery life only for OLED and AMOLED panel-equipped Android smartphones.
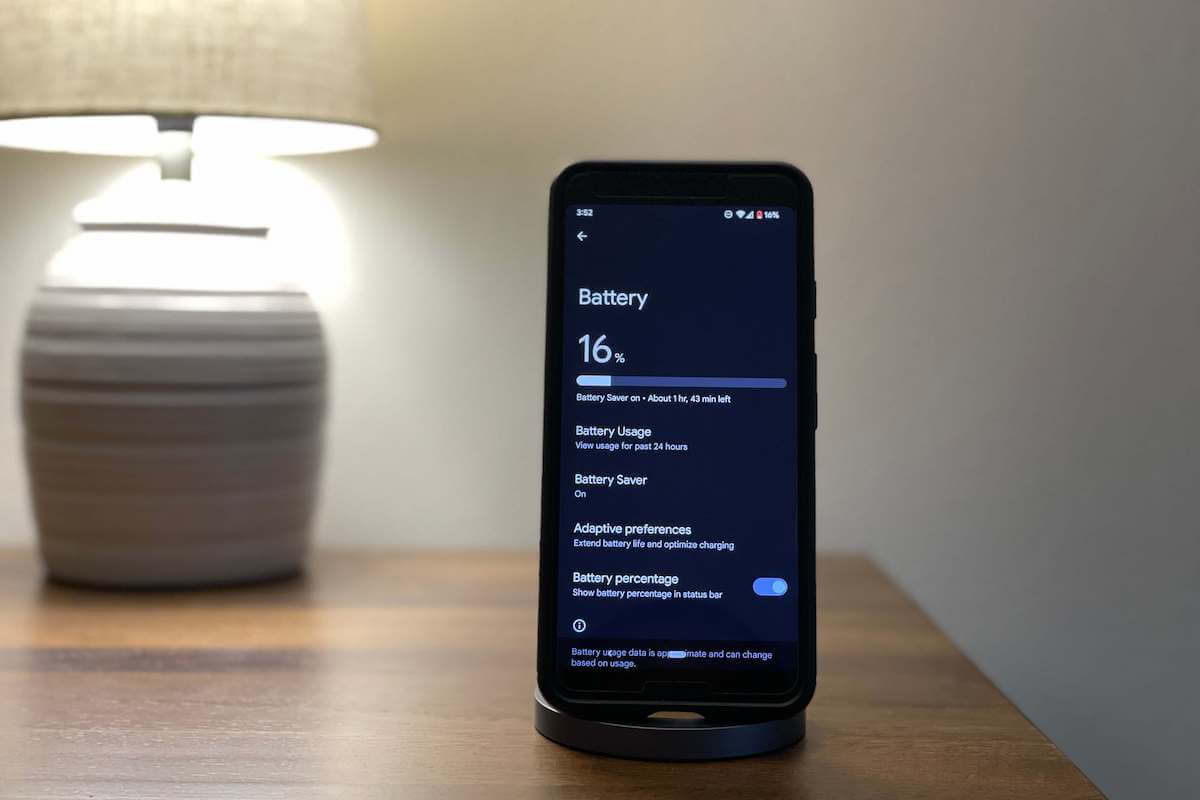
6. Turn On Battery Saver Mode
Speaking of increasing the battery life of your Android phone, Android has a dedicated Power Saving Mode that can be very useful in this particular situation.
Here’s how to enable the Power Saving Mode on your Android.
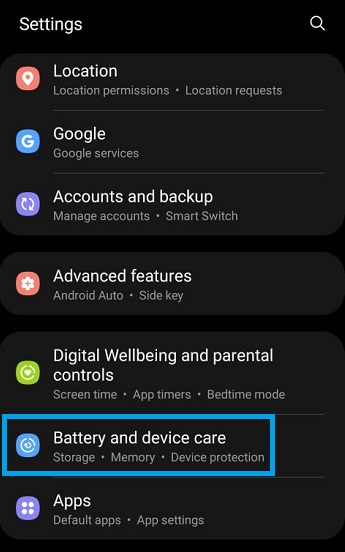
- In the Android Settings, tap on Battery and Device Care.
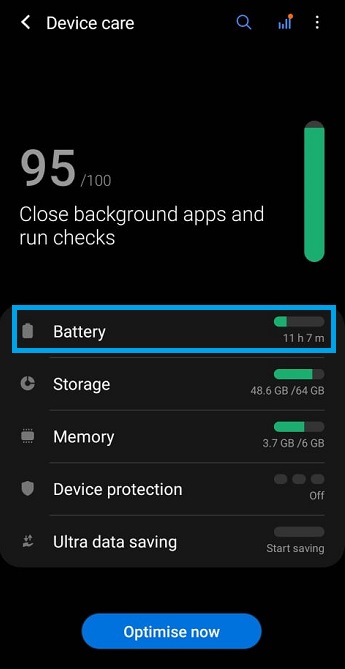
- In the Device Care menu, tap on Battery.
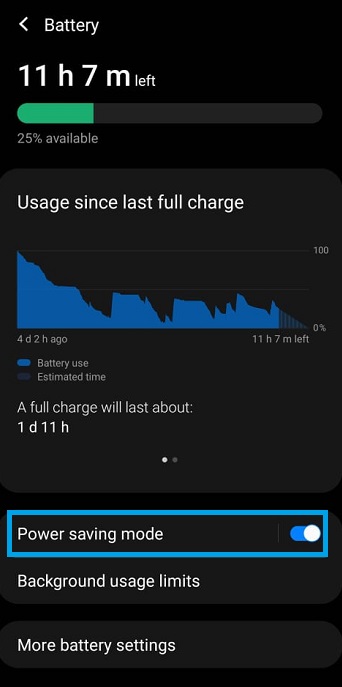
- Locate the Power Saving Mode and tap on the switch next to it to activate it.
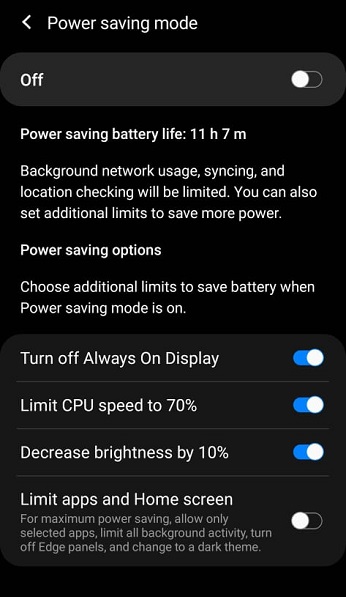
As soon as you enable this mode, network, location service, and syncing will become limited. The screen refresh rate will also be turned down. However, you also have the option of customization.
Instead of tapping on the switch, tap on the Power Saving Mode option. Here, you will come across a few customization options:
- Turn Off Always On Display
- Limit CPU Speed to 70%
- Decrease Brightness by 10%
- Limit Apps and Home Screen
So, you can either activate the Android Power Saving Mode, or you can enable the options of your choice from the Power Saving Menu. The choice is yours. But we highly recommend enabling the power-saving mode to get the best results.
7. Disable Automatic Wi-Fi
Wi-Fi consumes a lot of power, and if you are trying to increase the battery life of your Android smartphone, a small tweak in its settings would be helpful.
The “Automatic Wi-Fi” setting, when activated, it constantly searches for open Wi-Fi networks even when you have disabled the Wi-Fi. You should disable it to conserve battery life.
Here’s how:
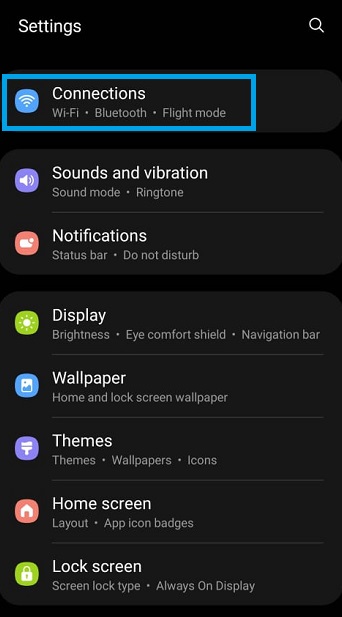
- Open Android Settings and tap on Connections.
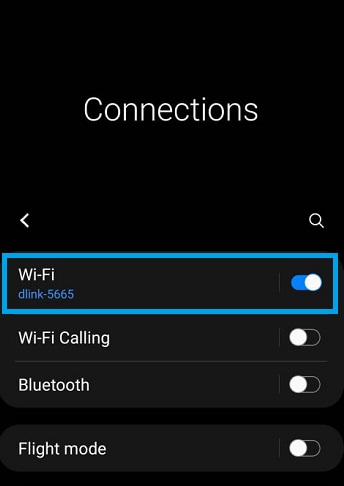
- In the Connections menu, tap on the Wi-Fi option.
- In the Wi-Fi menu, tap on the Three Dots at the top right side of the panel and select Advanced.
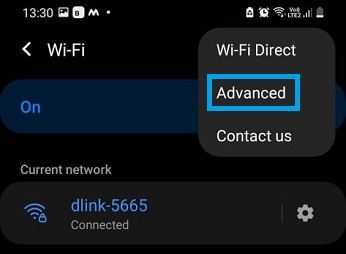
- Here, you will find Turn on Wi-Fi Automatically. Turn this off.

Disabling this feature won’t interfere with the Wi-Fi performance on your device. On the other hand, battery life would increase a bit.
8. Stop Background App Usage
One thing most people don’t get is that apps run in the background of Android devices, even when they are not being used.
This is nothing new, but the background usage eats up a considerable amount of battery charge. If your goal is to extend the battery life, you need to limit the app’s background usage.
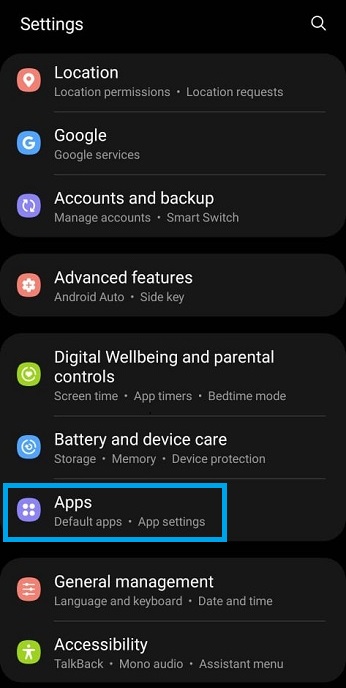
- Run the Settings app on Android and tap on Apps.
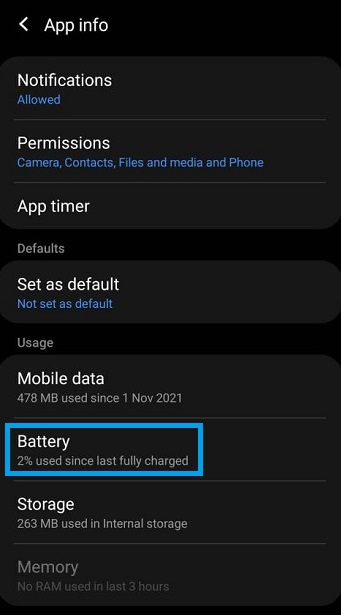
- Now, locate the app you want to restrict and tap on it.
- Select Battery under App Info.
- At the top, there will be an option called Allow Background Activity. Disable it.
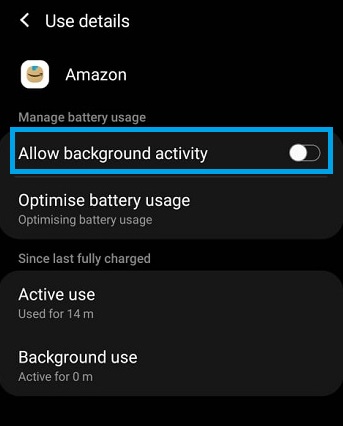
The app won’t be operating in the background anymore. If possible, do this for all the applications that you use frequently.
But do not use this tip on Messaging applications. If this feature is disabled on the messaging apps, they will not be able to receive messages.
9. Use Lite Versions of Apps
Switching to lite apps is another snappy way of extending your mobile’s battery life without sacrificing much.
The Lite Apps are a toned-down version of the original application. They put less strain on the device and, of course, consume fewer resources.
The core features of the app would still be available. So, you won’t be missing out on anything important. Give this a try.
10. Disable Google Assistant
Google Assistant is one of the best voice assistants out there. It is handy and has nice features, but it can take a heavy toll on your battery.
When Google Assistant is activated, it is always ready for your command—listening to your every word.
This is convenient for some people, but when you are struggling to maximize your battery life, it’s a luxury you can’t afford.
Here’s how to disable it.
- So, you need to tap on Google in the Android Settings.
- After that, select Settings for Google Apps and tap on Search, Assistant, and Voice.
- Now, tap on Google Assistant.

- Scroll down and select Hey Google and Voice Match.
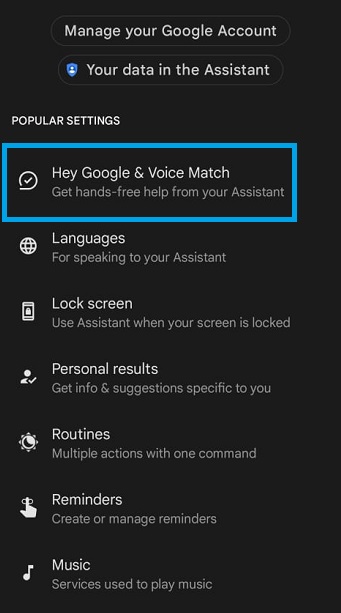
From here, you can disable “Hey Google” if it was enabled in the first place.
Wrap Up
Hopefully, you are getting more juice out of your Android battery after implementing these tips and tricks.
If your smartphone is older than three years, maybe it is time to replace it with a new one. Follow the tips in this smartphone buying guide to get the best bang for your buck.
After prolonged use, smartphone batteries start to deteriorate. Implementing these tips and tricks will increase the battery span, but you should be looking for a replacement in the meantime.
If the smartphone is new and you are still unsatisfied with its battery life, start carrying a portable power bank. It will cost money, but you won’t have to worry about battery draining issues.