Have you ever come across the “Unfortunately, the process Android.Process.Media has Stopped” error on your Android phone?
This pop-up error is very frustrating as it doesn’t go away easily. Fortunately, this is a common Android error and there are a few verified easy solutions available.
In this guide, we will go through the possible causes behind this pop-up message. We’ll also give you some efficient and effective troubleshooting tips that will help you get rid of this annoying error.
Check this out: How to Fix There Was a Problem Parsing the Package
Why Does “Android.Process.Media has Stopped” Problem Occur?
When the “android.Process.media.has.stopped” error keeps showing on your screen, the problem can be down to a number of different issues. Below, you’ll find a list of the most possible causes.
- Malfunction while updating the firmware
- Internal storage is completely consumed by the installed applications
- Problems while rooting the Android device
- Moving to a different custom ROM
- Malicious attack by a virus or malware
The error is most likely popping up due to one of these issues on your Android device. Now, let’s move on to the solutions.
5 Tips for Fixing “Android. Process.Media has Stopped” Problem
The “Android.Process.Media had Stopped” error is common but a critical issue on Android and it is not likely to go away on its own. So, we have listed a few easy solutions below for you to check out.
- Reboot Your Android Mobile
- Reset App Preferences
- Clear Cache and Data on Android (Google Services Framework & Google Play Store)
- Firmware Update
- Factory Reset
1. Reboot Your Android Mobile
If the “Android.Process.Media had stopped” message is popping up on the screen of your Android mobile, reboot the device immediately.
Rebooting the device is one of the simplest fixes out there. And in most cases, when the problem is caused by minor glitches, a simple restart can be very effective. So, hold that Power button and tap on Restart.
There is a chance of the error message popping up even after restarting the device. If that happens, move on to the next solution.
2. Reset App Preferences
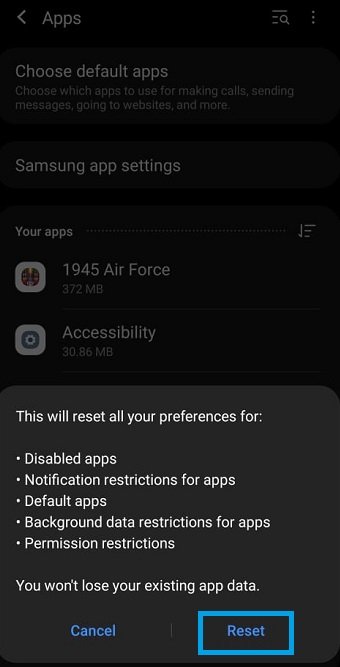
Resetting app preferences on your Android settings can be effective against this problem. The steps below will show you how to reset your app preferences on your Android.
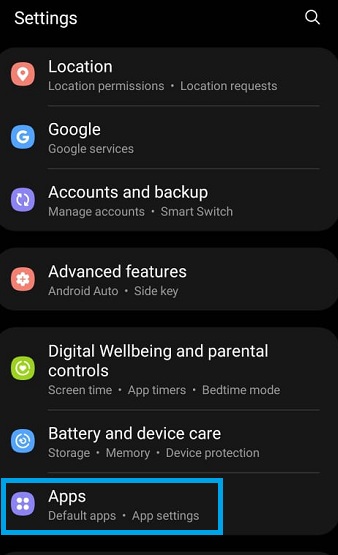
- Launch the Settings app on your Android mobile and tap on Apps.
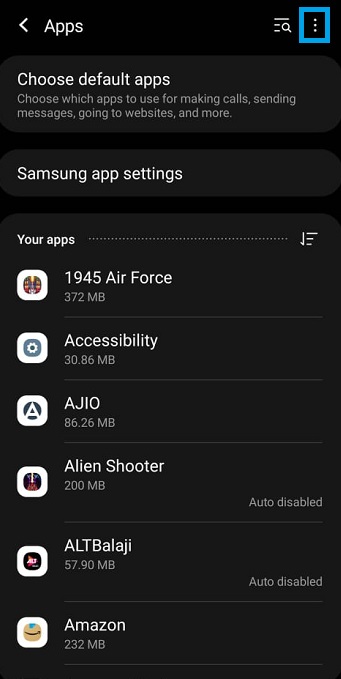
- In the Apps menu, tap on the Three Vertical Dots at the top right corner of the screen.
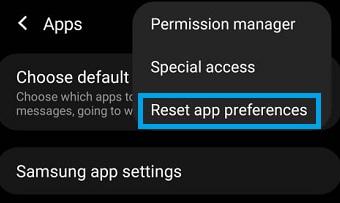
- In the drop-down menu, tap on Reset App Preferences.
- A pop-up panel will show up at the bottom of the screen, tap on the Reset button to reset your preferences.
After resetting the app preferences, the error should disappear. If not, don’t worry. There are more solutions available.
3. Clear Cache and Data on Android (Google Services Framework & Google Play Store)
Sometimes, these types of errors appear because there are too many cache files on your Android mobile.
If this is the cause, you just have to get rid of those temporary files and the problem should also disappear with them.
In this case, clearing the cache of the Google Play Store app and Google Services Framework should do the trick.
Google Play Store
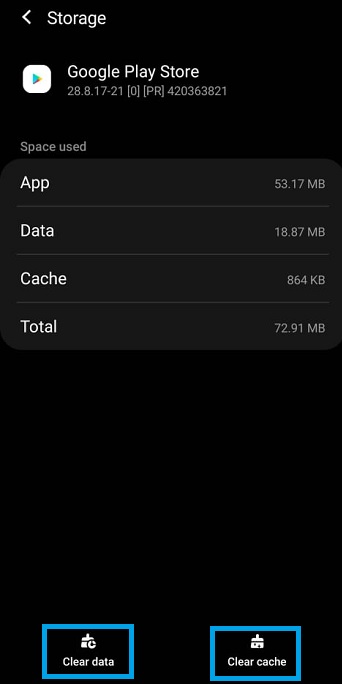
- Launch the Settings app on your Android mobile and tap on Apps.
- Under the Apps menu, locate the Google Play Store app and tap on it.
- Under App Info, tap on Storage.

- You’ll find two options at the bottom, Clear Data and Clear Cache. Tap on these options to clear the files.
Google Services Framework
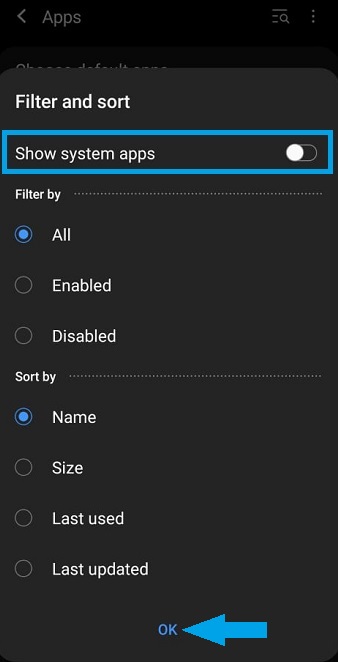
You just need to perform the same process for Google Services Framework. But this app won’t be available unless the visibility of the system apps is enabled. So…
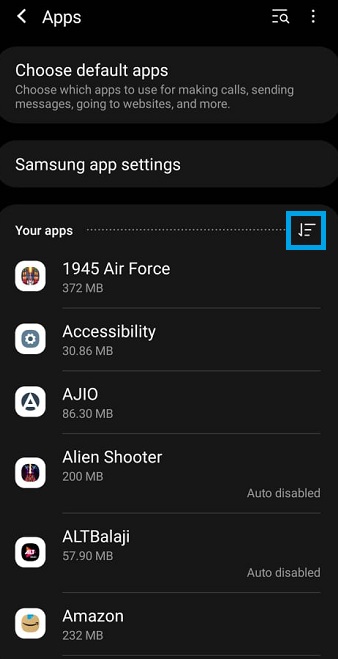
- Under the Apps menu, tap on the sign with Three Parallel Lines and a Down Arrow.
- Enable the Show System Apps option and then tap on OK. After that, Google Services Framework will be visible on your search.
- Select the Google Services Framework and tap on Storage.
- Here, you will find Clear Data and Clear Cache options. Tap on these buttons to remove the temporary files.
This is a very effective solution and it works most of the time. Hopefully, this would be enough in your case. Otherwise, move on to the next solution.
4. Firmware Update
Updating the firmware is one of the best fixes and Android issue updates quite frequently. If none of the previous methods has worked, then you should be updating the firmware.
- First, you need to connect your phone to a Wi-Fi network. Otherwise, the update will be downloaded via Mobile data.
- Next, launch the Settings app on your Android mobile and tap on Software Update.
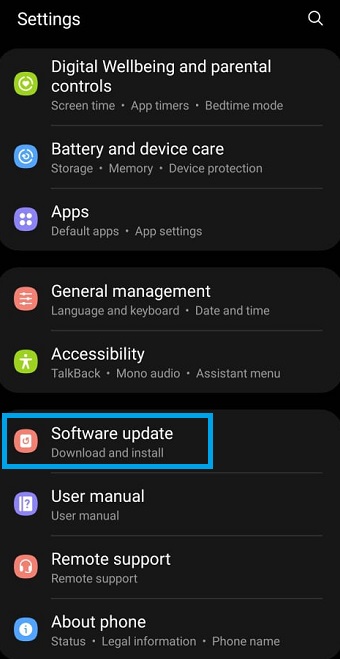
- Tap on Check for Updates.
The device will start searching for available updates. If an update is available, download it and then tap on the Install button to install the new update.
After the latest update is installed, the error shouldn’t be appearing anymore. But this solution is a bit conditional. If an Android update isn’t available, you’ll need to try the next solution to fix this error.
5. Factory Reset
If the error is still popping up, then you have no option but to factory reset your Android device.
It is the most effective way to get rid of this error but factory data reset also means, you will lose all the files and custom settings present on your device. So, make sure to have a recent backup of your phone or back up your Android phone now.
- Launch the Settings app on your mobile, then locate and tap on General Management.

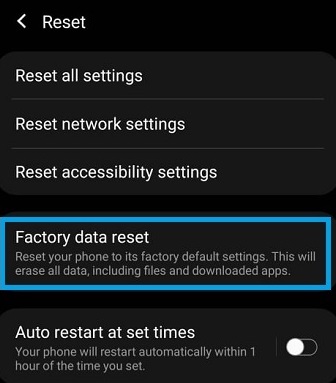
- Scroll down and tap on Reset.

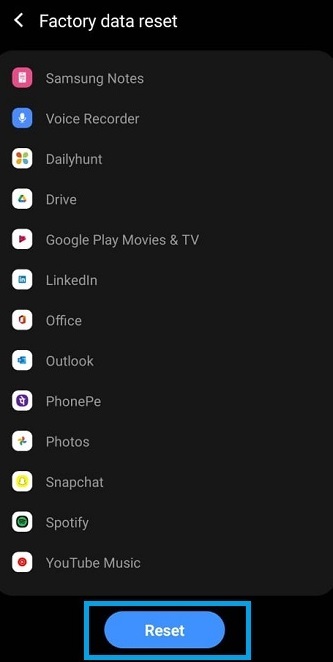
- Under the Reset menu, tap on Factory Data Reset.
- Lastly, hit the Blue Reset Button to confirm your decision.
The device reset will take a few moments. After that, you will have to set up the device as a new but the error message will not appear again.
Wrapping It Up
And there you have it. Our step-by-step guide to fixing the Android process media has stopped error on your Android phone.
We hope you find the troubleshooting tips in this article useful to help you get rid of this annoying error message.
Let us know if this helped fix the Android process media has stopped error. If you found success doing something else, leave me a comment down below!