AirPods are the most popular earbuds on the market, and they only seem to be growing in popularity with each passing day.
They’re extremely high-quality products, produce amazing sound quality, and unlike many other Bluetooth options, they’re actually reliable.
However, they also require proper care if you want to keep them operating at their peak potential for years to come.
Today, we’ll go through each part of the cleaning process in detail to ensure you keep your AirPods hygienic and sound great for years to come. Let’s get started.
Why Clean Your AirPods Regularly?
Cleaning headphones and earbuds tend to be one of those tasks most people neglect.
However, there are some serious reasons to do it, especially for something such as a set of AirPods that are placed inside of your ear.

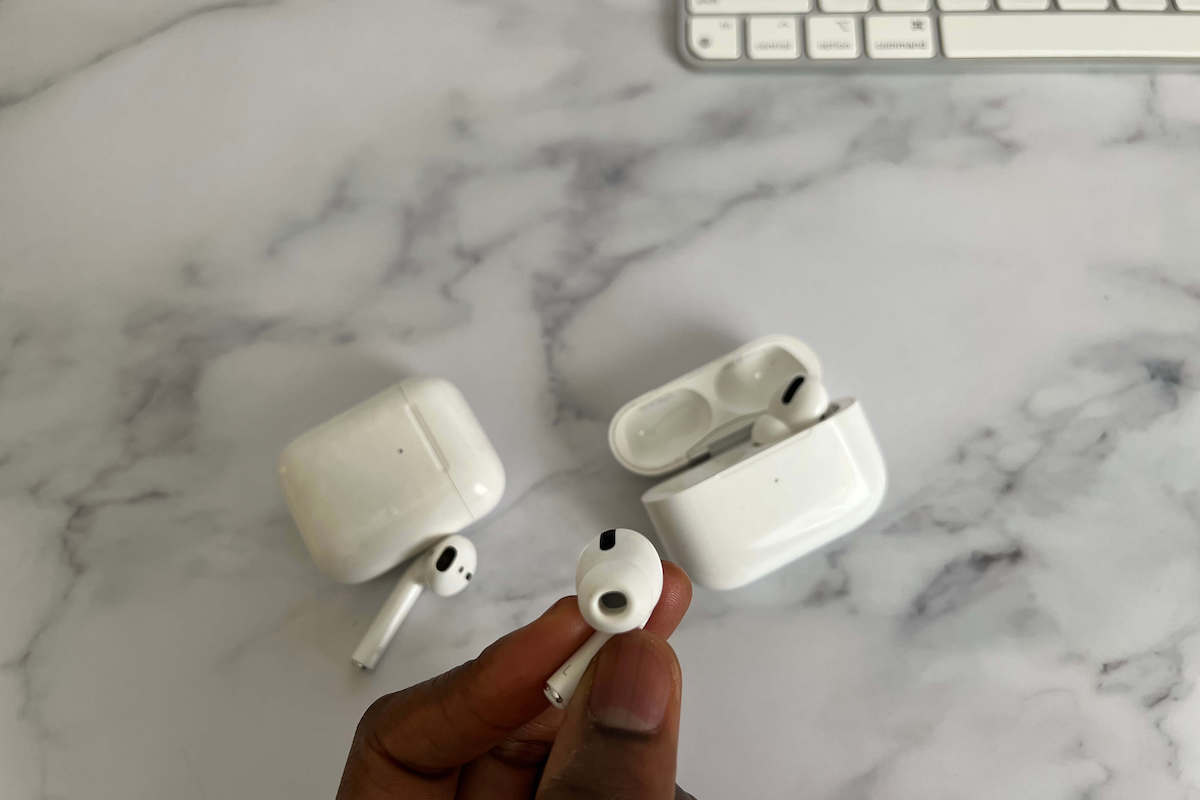
The AirPods will pick up debris in the air or from surfaces you casually rest them on, and they’ll pick up dead skin and dirt from your ears.
You can get ear wax on them if you’re not particularly careful about your ear hygiene, too, which leads to three problems.
- First, they look gross (like the ones above), and with a luxury item such as AirPods, you really should try to keep them looking as clean and proper as possible.
- Then, there’s the chance of you introducing debris and bacteria into your ear canal. This isn’t typically a problem, but if you get something particularly nasty on your AirPods or bacteria build up on them, you can cause yourself some health problems over time, such as ear infections.
- Finally, and this is the most common problem that occurs, you can damage the AirPods. Debris can build up, enter the speakers, and in the best-case scenario, your audio will sound muffled, or the mic may not work until you clean them.
In some cases, if there’s a dirt buildup blocking the charging plate in your Airpods, your AirPods won’t reset, or one of your AirPods may not charge
In the worst-case scenario, your AirPods will suffer internal damage, and you’ll buy a replacement set sooner rather than later.
What You’ll Need to Clean Your Air Pods
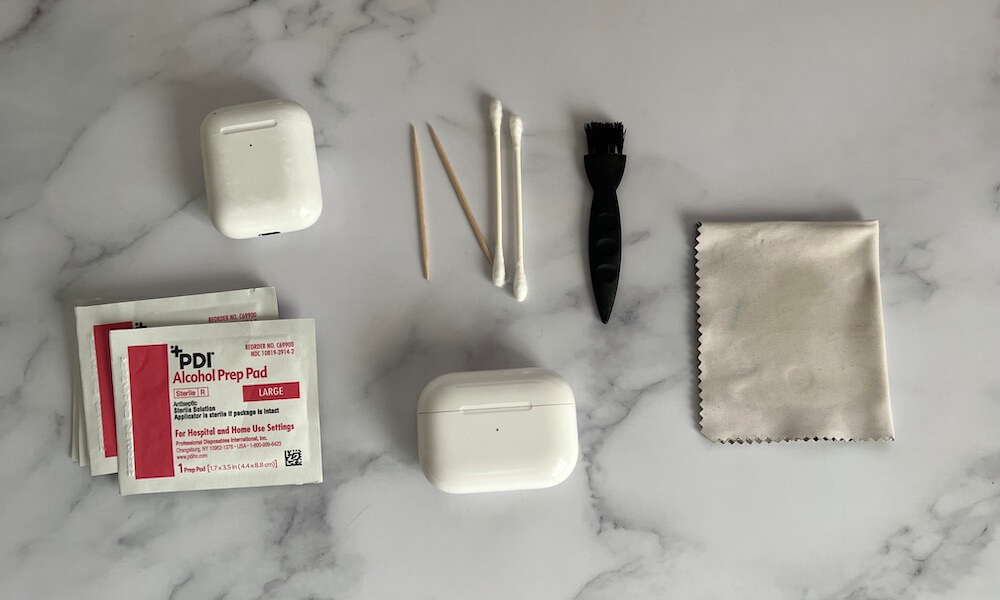
To clean your AirPods properly, you’ll need a few household items.
- Lint-free cloth
- Q-Tips
- Cotton swabs
- A soft toothbrush used only for cleaning
- Rubbing 70% pure isopropyl alcohol
- A clean, dry surface
Most of those items are self-explanatory, but we’d like to note that you shouldn’t use strong forms of rubbing alcohol.
The ideal strength is 70% alcohol or less. Anything more, and you’ll damage the plastic casing of the earbuds and the case.
Steps to Clean Your AirPods Properly
Cleaning your AirPods should only take about ten minutes of your time if you’re really paying attention to the details, and usually, it’s a lot faster than that.
However, we don’t recommend speeding through this process. You want to ensure that you’re cleaning away as much debris as possible to prevent it from sitting around and causing damage.
Going too quickly also increases the chances of you making a major mistake, such as using too much liquid, which can be catastrophic.
1. Clean the Bulk of Debris with a Dry Lint Free Cloth
First, you’ll want to get the bulk of the dirt and debris off the surface of the AirPods and their case.
This is the simplest and safest part of the process. Take your lint-free cloth, like the ones you get with eyeglasses or phone cleaning kits, and gently wipe off all the surfaces.
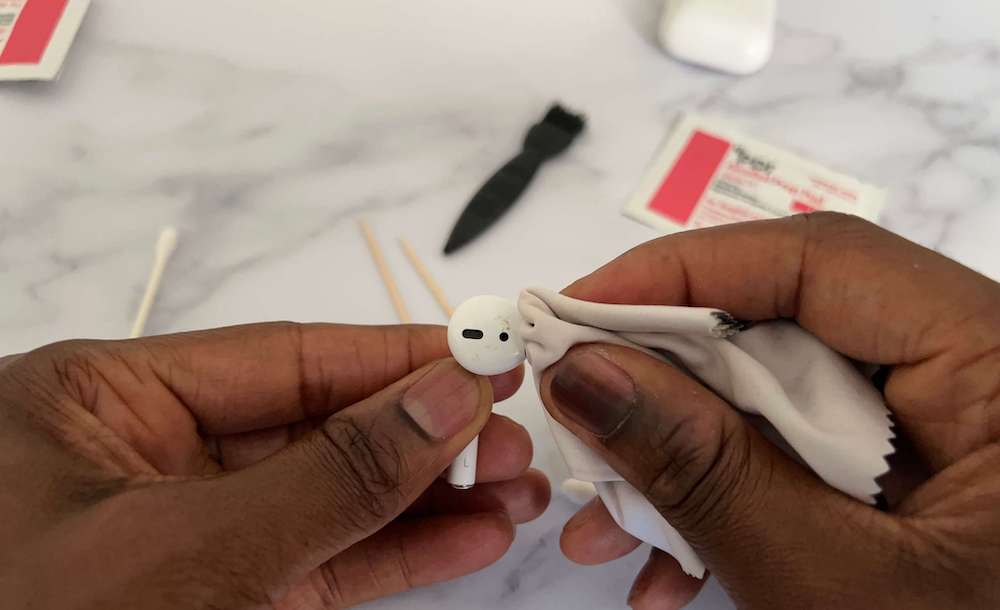
This will be enough to get all the loose debris off the surface, but it won’t be enough to clean out the crevices in the device or the case. So, even if it looks clean, you have more work to do.
You should technically perform this step by itself more frequently than you do a full cleaning process.
If you wipe your AirPods off frequently, you won’t have to commit to this full cleaning process nearly as often because dirt won’t build up as quickly.
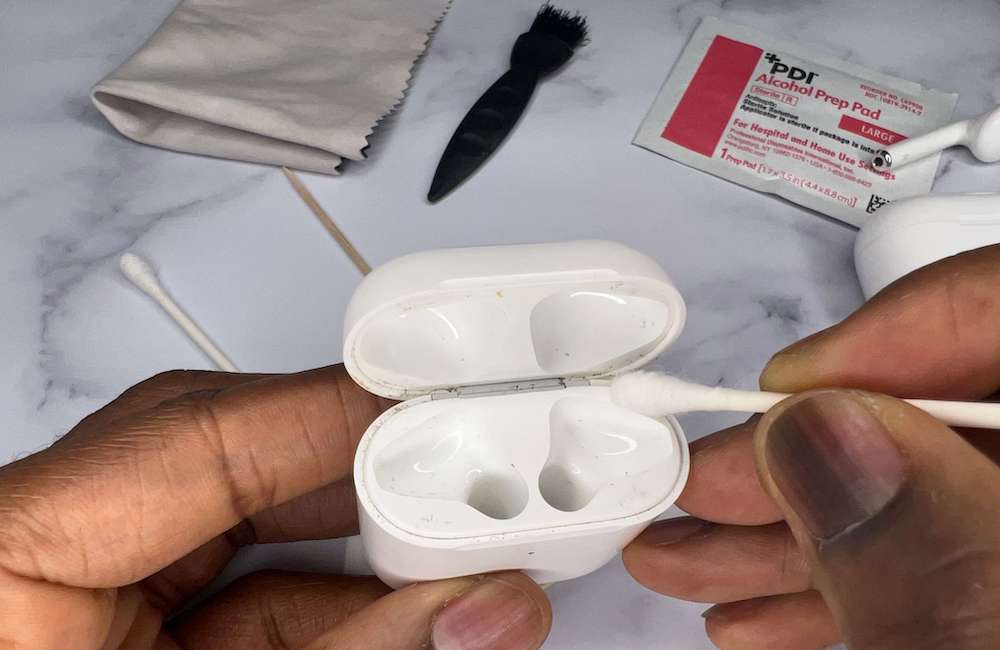
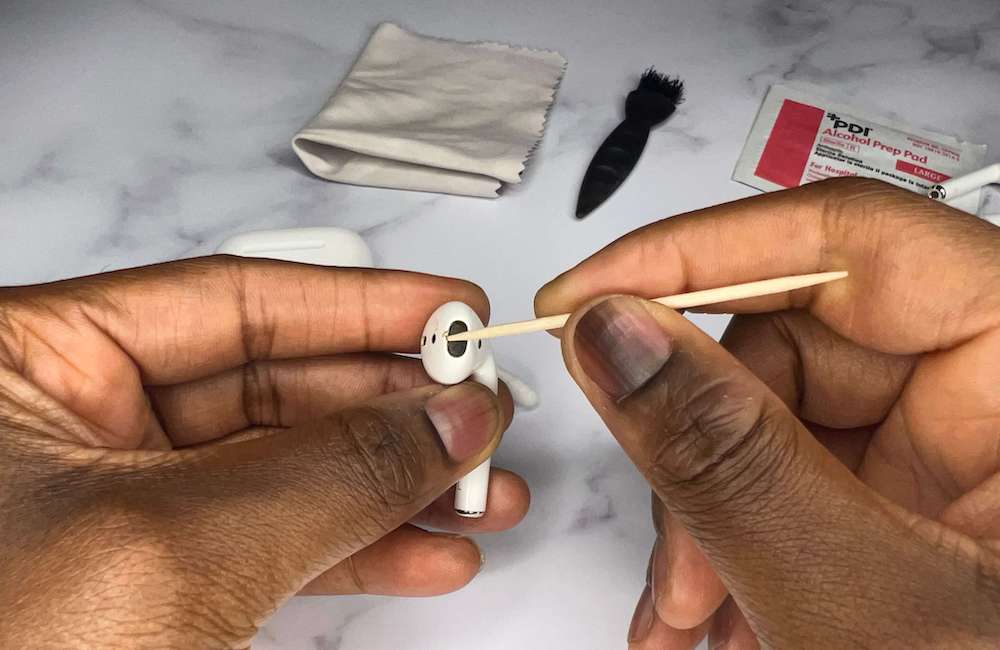
2. Clean the Crevices
Now, you have to take care of the crevices. AirPods are sealed up fairly well, and the case only has a few problematic areas, but you still need to worry about those little crevices.
They’re easy to miss, they’re hotspots for dirt buildup, and they can cause some serious problems.
Take the hinges of the case, for example. A little dirt might not seem like a problem, but it will quickly damage the performance of your case.
To handle this, use a dry Q-Tip and carefully wipe off any debris within the crevices.
Also, very gently, scrub the mesh on the AirPods to remove debris that is lodged in it. The little bits lodged in the mesh can cause sound-quality issues in the long run.
In this case, pay the most attention to the hinges and the small charging area that is exposed in the AirPod wells. However, you should also scrub any other spots that the lint-free cloth missed.
3. Sterilize
After you’ve removed as much debris as possible, you’ll likely still see some debris that just wouldn’t come off with a cloth or Q-Tip. This is where the rubbing alcohol comes in.
Before performing this step, make sure your rubbing alcohol is less than 70%. The 80% and 90% rubbing alcohol various are far too strong, and they will eat away at the plastic on the AirPods and the case; you can’t fix it if that happens.
Start by dipping another Q-Tip in the rubbing alcohol. You want to lightly soak the Q-Tip in alcohol.
You do not want it to be dripping everywhere or otherwise have too much liquid on it. If you do, that excess liquid will drip into the internals of the AirPods and potentially destroy their internal parts.
Lightly and gently wipe the AirPods with the Q-Tip across the plastic parts and the mesh. This should remove any debris that the dry tools missed.
Then, get another Q-Tip prepared, and do the same to the entire surface of the case in the exact same way.
After wiping the AirPods and their case with alcohol, use your lint-free cloth to dry both items and remove any residue left by the alcohol solution.
Now, your AirPods are properly cleaned. Repeat this process about once a week to once per month, depending on how frequently you’re using your AirPods, and don’t forget to wipe them with a lint-free cloth after every couple of uses.